
This replacement was done with the Suspension Techniques kit on a '91 NA and a '91 TT at different times. Special thanks to ~2TURBOZ~ for the original document this page is based on.
Special Tools:
Air impact wrench
Torque wrench
Notes:
Depending on the installation, the rubber bushings might have to be
ground down to fit properly. Refer to the instructions included with the
kit for more details. Basically, the flat surface of the bushing should
only extend 1/32" to 1/16" out of the supplied bushing bracket. The front
kit comes with some washers for spacing, the rears might still need to
be ground down some.
The front ASBs have 2 different adjustment holes, most street drivers will choose the holes on the end of the ASB. The rear has three holes, most street drivers will choose the middle set of holes. Moving to the end holes will increase understeer, while selecting a hole towards the center of the ASB will increase oversteer for whichever end the ASB is on.
If you are fortunate enough to use a car lift, removing the front ASB is going to be much easier to snake out. Only the passenger side tension rod needs to be disconnected. On the flip side, installing the rear ASB will be more difficult without being able to left up the hubs easily.
Installation:
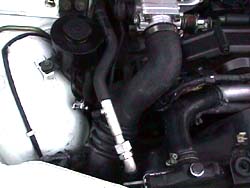
1. If installing on an NA remove the passenger side intake hose (2 hose clamps 8 mm) (1.), stuff a rag in the lower opening to avoid dropping foreign objects inside.
2. Unclip the plastic hanger on the passenger side aluminum air conditioning hose (2.). DO NOT disconnect any pressure fitting on the AC hose. The freon will escape & the system will need to be recharged. Something that could be really expensive can EASILY be avoided.
3. Break loose all the wheel lug nuts (20 x 21 mm), only a 1/2 turn or so each. Jack up the front of the car & put it on jack stands observing all safety measures. Remove the front wheels.
4. Remove lower engine shielding (6 x 10 mm), there is 1 on the extreme left and right sides.
5. Read the rest of the procedure to see what bolts/nuts will be removed & spray them with a penetrating lubricant. I recommend 'PB Blaster' brand.
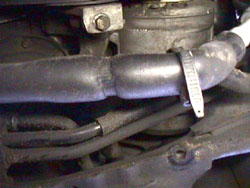
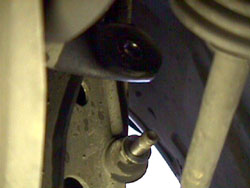
6. Unclip the lower AC hose clips on the front suspension cross member (3. & 4.) & one on the side of the passenger fender well. It's behind the power steering hose (view from below 5.).
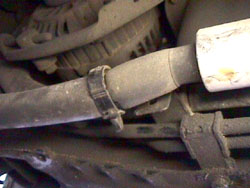
7. Remove the plastic air deflectors from the tension rods (if equipped with). Remove the nuts on the tension rod ends (2 x 17 mm) and disconnect the tension rods from each lower control arm (6.)
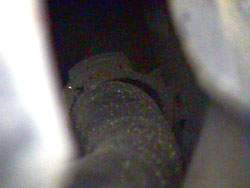
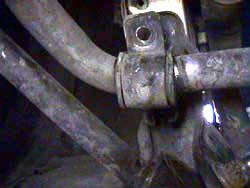
8. Remove the nuts on the connecting rod ends (2 x 12 mm) to free up the ends of the ASB (7.).
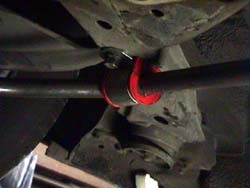
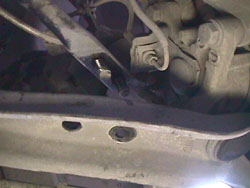
9. Remove front ASB bushing retainer bolts (4 x 14 mm) (8.). Remove bushing brackets & the bushings from the ASB.
10. Pull the AC hose down as far as possible. Do not apply too much force to this hose. It is rigid aluminum and can be easily damaged. Get the driver side end of the ASB under the lower control arm. Be very careful not to pinch the AC hose, or the ABS/brake lines around the passenger side of the ASB. I found it effective to use the floor jack to gently lift up the driver side lower control arm to facilitate this move.
Note: Patience is a virtue here. It will take some time and effort to jockey the ASB so the driver side will drop down. Once both sides are down the ASB can be snaked out to the drivers side. Make a mental note of the process to get old ASB out. It makes installing the new ASB simpler.11. Get the new ASB in place in reverse fashion as above.
12. Use the provided lithium grease to lube the inside of each front bushing (9.). Slip the bushings onto the ASB in the appropriate places. Refer to the Notes section at the top of this page for fitting info. Use two of the supplied washers in-between the new bracket and the frame rail for each bolt. Loosely bolt the brackets back in place (4 x 14 mm) (10.). If the bolts don't go in place, the bolts holding the front of each tension rod bracket might have to be loosened (2 x 17 mm ea. side). Once the entire tension rod bracket is loose, then holes can be re-aligned if required.
13. Bolt the end links back on the ASB (2 x 12 mm). Torque to 18 ft-lbs.
14. Torque the front tension rod bracket bolts (2 x 17 mm) to 80-94 ft-lbs if required. Get the tension rods attached to the lower control arms. The instructions that come with the ASBs are incorrect listing a 22 ft-lbs torque spec for the tension rods, *please* ignore that! Torque the nuts (2 x 17 mm) to 80-94 ft-lbs for all except the convertible, which needs 69-83 ft-lbs. Torque the bushing bracket bolts (4 x 14 mm) to 18 ft-lbs.
15. Re-clip the AC line in the engine bay, replace the intake hose if installing on an NA. Don't forget to remove the rag. Replace the plastic air deflectors on the tension rods.
16. Install lower engine shielding (6 x 10 mm), there is 1 on the extreme left and right sides.
17. Re-mount the wheels, finger tighten the lugs. Lower the front of the car back on the ground. Torque the lugs to 80 ft-lbs in a skip 1 pattern (10 x 21 mm).
18. Jack up the rear of the car & put it on jack stands observing all safety measures. Remove the rear wheels (10 x 21 mm).
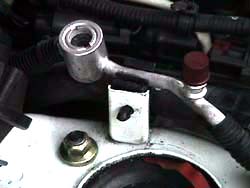
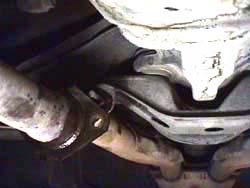
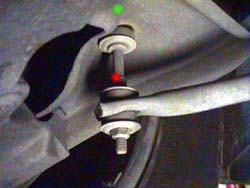
19. Disconnect the exhaust at the axle (4 x 17 mm) (11.). Disconnect the end links, use a 10 mm wrench to hold the middle of the link (red dot in 12.) and 12 mm to remove the nuts on top of the the suspension arms (green dot in 12.).
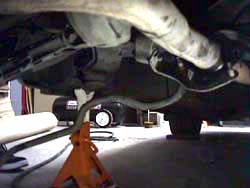
20. Remove the rear ASB bushing brackets (4 x 12 mm). Move the ASB around and slip it through the gap in the exhaust pipes (13.). A helper pulling on the muffler sections will make this easier to fit the ASB through.
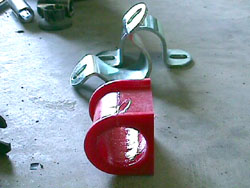
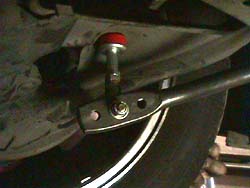
21. Build up the new end links according to the diagram provided on the instructions, which works like this: Take the end link bolts, put on one of the cupped washers with the inside pointed away from the bolt head. Put one of the red round bushings on the bolt next, with the rounded side going into the cupped washer. Drop that through the lower control arm where the old end link was mounted. Slip another red round bushing up the bolt followed by another cupped washer, both inverted compared to the top. the lower control arm is sandwiched now. The long sleave/spacer is next, followed by the smaller jam nut holding everything in place. Run the jam nut up the bolt until the red bushings start to bulge (14.). Finally, a rod end (spherical bearing) goes on last. Twist it as far up as it will go while leaving it angled forward. Using more hands then a single person generally has, hold the bolt still, while holding the angle of the rod end the same, and back the jam nut into the eyebolt to hold everything in place. Do this on the other side too.
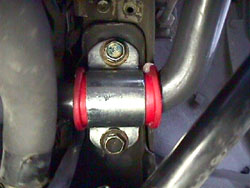
22. Lube the inside of the new bushings with the provided grease. Slip them onto the new ASB at the far sides right up against where they sweep back. Get the new ASB in position by putting it up through the exhaust pipe gap. Refer to the Notes section at the top of this page for fitting info. Bolt the rear bushing brackets on (4 x 12 mm) (15.). Torque bolts to 18 ft-lbs.
23. Use the jack to carefully lift up a lower suspension arm. Put the jack's cup on the lower shock mount and slowly lift the arm up. Don't lift the car off the jack stand!!! Lift to where the end link is outside the sweep of the ASB. We opted to us the middle hole on the rear ASB on Jeff's car. The bolts are another assembly: The mounting bolt has a regular washer, then a short spacer, then goes through the rod end into another short spacer. Use the jack to change the angle and run the bolt through whichever hole selected on the ASB. The end link will go to the outside of the ASB. After it's through the ASB, there's another regular washer and a nylok nut holding it all together (14.). Torque to 18 ft-lbs. Use the same basic technique to attach the end link on the other end of the ASB. Be patient, it will probably take a couple tries with a touchy hydraulic jack.
24. Put the exhaust back together (4 x 17 mm). Torque to 32-41 ft-lbs.
25. Re-mount the wheels, finger tighten the lugs. Lower the rear of the car back to the ground. Torque the lugs to 80 ft-lbs in a skip 1 pattern (10 x 21 mm).
© Twin Turbo Zs of
Dallas - All Rights Reserved 2000
2.
3.
4.
5.
6.
7.
8.
9.
10.
11.
12.
13.
14.
15.