Internal combustion engines are, at the most basic level, air pumps. If you pump more air through them you will get more power. There are some little details that get in the way of this simplistic view, but it works well for this discussion. Turbo and Super chargers create power by forcing more air through the engine. Porting and polishing, valve lift and duration, and all the other little tricks create more power by forcing more air through the engine. Intercoolers and cold air induction systems create power by making the air that is forced through the engine more dense, which means more air is forced through the engine. Trick exhaust systems allow the air to leave the engine faster which means more air can be forced through the engine.
There are three things needed for an engine to run; air, fuel, and spark. The ECU measures how much air is flowing into the engine, controls how much fuel is sent to each cylinder, and when the mixture is burned. The ECU also measures the oxygen content of the exhaust so that it can keep the mixture of air and fuel at a safe (and efficient) level to minimize detonation while maximizing power.
Why the ECU programming is important:
Nissan engineers were given a specific set of operating parameters for the VG30DE(TT) engine. They wrote a map of fuel/air/timing settings to match the parameters given. This did not include the performance goodies we add to our cars. The operating parameters for the stock ECU setup cover 0 - 7000 rpm, 0 - 155mph, 0 - 300 hp, 92 octane gas. When the engine operates outside of these assumptions, the ECU does not have the information needed to make a safe and efficient setting of the fuel/air mix or ignition timing. It will make assumptions and the engine will run, but it will not be at an optimum level.
On an otherwise stock 300ZXTT, increasing the boost level will increase power dramatically. It will also increase the risk of detonation. Detonation will do some damage to the engine every time it happens. It may be as simple as erosion of the spark plug electrode or as drastic as a hole in the piston. If detonation occurs for a long enough time, it will destroy the engine, possibly beyond repair.
Some ECU reprogramming companies simply remove the top speed limiter and assume the driver will not drive really hard very often and not destroy the engine. Others will simply increase the amount of fuel delivered at full throttle, while this will limit the possibility of detonation it will not be efficient and may not give maximum power.
Jim Wolf Technology rewrote the entire fuel/air/timing map to optimize the settings for power. They also greatly expanded the size of the map to provide settings far beyond the stock map. They have customized setups for just about every combination of aftermarket performance goodies available on the market. I have seen JWT chips for cars with twin intakes and 370cc, 485cc, and 555cc injectors; all of the above with nitrous injection; all of the above with 100+ octane race gas. You get my point. JWT also took the additional effort to get the standard program certified by the CARB so it is legal to install in cars operated on the highway in all 50 states. I am not aware of any other ECU reprogrammer that has made that effort for our cars.
While having a JWT chip in your ECU will not guarantee you won't get detonation, it is far less likely than with most of the other ECU chips.
Installation:
What would a modified TT be without upgraded software? Heh! Not nearly as much fun as it could be! Jim Wolf is the dominate manufacturer of aftermarket ECUs for Nissan vehicles & is the unit I installed for this page.
Swapping the ECU:
Installation is simple & takes about 15 minutes to do.
1. Disconnect the negative battery terminal & make sure that it can't reconnect.
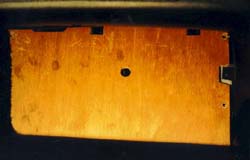
2. Remove the passenger side floor mat & peel the carpet from the top of the firewall down. It's held on with some velcro to a wooden panel (1.). Remove the 4 bolts holding the wooden panel to the firewall & pull it out. (2.)
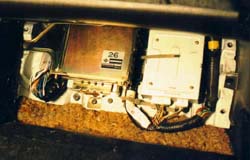
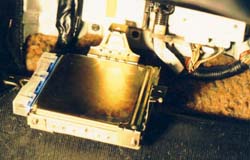
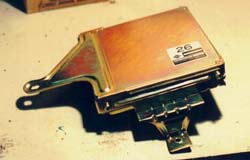
3. There are three bolts holding the ECU's mounting bracket to the firewall, remove them to 'flip' the ECU out of it's hiding place. (3.) Unscrew the bolt holding the blue plug into the side of the ECU, this should free up the ECU & mounting bracket. (4.)
4. Remove the 4 screws holding the ECU in the mounting bracket. Exchange ECUs & reverse the steps to re-install. NOTE: Make sure that the blue plug is seated evenly all the way across. Just because the bolt is tightened doesn't mean the plug is seated...
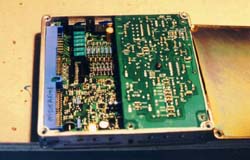
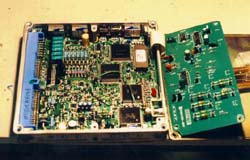
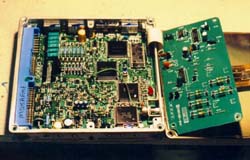
Here are some other views of the inside of the ECU if you should ever have to switch chips out:
NOTE: ***Before doing anything to the inside of the ECU, make sure you understand ESD. ElectroStatic Discharge is a killer of sensitive electronics. Your body is capable of storing enough electrical charge to toast certain components. If you own a grounding strap, use it. If not, make sure you hold onto something that is grounded (you basically want to shock yourself on something other than the ECU!) to prevent ESD.***
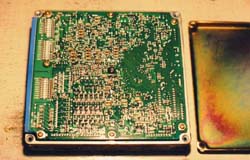
This is the inside of a '90 model ECU. There are some differences from year to year. The second board hides the modified EPROM (5.) & must be unscrewed to swap it out, it's attached to the main board by a ribbon cable. 'Flip' it over to the side, exposing the EPROM (6.) The chip with the white sticker on it is the JWT EPROM. The EPROM comes out by gently pulling from the two ends that don't have pins coming out. Be EXTREMELY careful when doing this to pull the chip straight up, otherwise it's possible to bend or worse yet, break off the delicate pins! When placing the chip in the empty socket (7.) make sure the end of the chip with the 'notch' in it is toward the end of the socket with a notch too, you can also look for the trace numbered 1 coming out from under the socket on the board. Because I was already there, I took off the back of the ECU (8.) to look at the quality of JWT's work... first class!
Installing the Boost Jets:
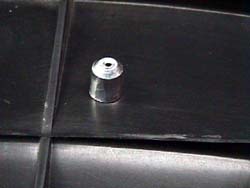
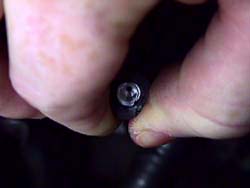
The ECU doesn't do much without the boost jets. This is where the horsepower comes from. They're about the same size & shape as a .22 caliber hollow point bullet. Except they have a 1 or 1.25mm hole through them (9.).
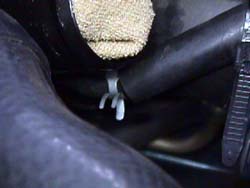
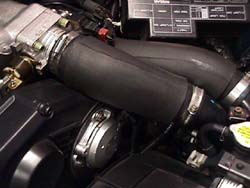
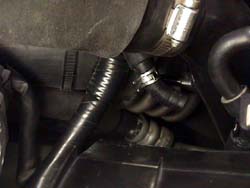
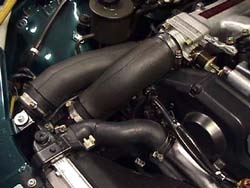
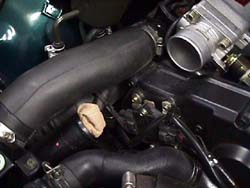
The jets fit in the end of the wastegate vacuum hoses. These attach to the fittings on the bottom side of each intake pipe before the rubber intake hose that feeds each throttle body. To do the driver side (10.), grab the squeeze clamp (11.) with a pair of pliers & move it down the hose, then pull the hose free from the pipe. Insert the boost jet 'nose' first into the hose (12.). When reseating the hose, they get pushed further in. Be VERY careful not to drop them down into the engine compartment. The passenger side (13.) is a little more difficult. Remove the rubber intake hose feeding the throttlebody (14.) to get to the fitting on the intake pipe. Loosen the hose clamps & slide it off. Stick a shop rag in the intercooler tubing to keep anything from falling in. Repeat the procedure from the driver side (15.). Then reattach the intake hose.
DamonZ
Back to Tech page
© Twin Turbo Zs of
Dallas - All Rights Reserved 1998
2.
3.
4.
5.
6.
7.
8.
9.
10.
11.
12.
13.
14.
15.
